Discover the art of cooking a mouthwatering brisket on your gas grill with our easy-to-follow steps, ensuring tender and flavorful results every time.
Brisket is a classic BBQ staple that can be intimidating to cook, especially on a gas grill. But fear not, because with the right technique and some insider tips, you can achieve tender and flavorful brisket on your trusty gas grill.
In this article, we’ll guide you through the step-by-step process of cooking brisket on a gas grill like a pro. Get ready to impress your friends and family with mouth-watering BBQ goodness!
Choosing the Right Brisket
Choosing the right brisket is crucial for achieving a delicious end result. When selecting your brisket, look for one that has good marbling and a thick layer of fat on top.
This will help keep the meat moist during cooking and add flavor to the final product.
You’ll also want to consider whether you want a whole packer brisket or just the flat cut. The whole packer includes both the point and flat cuts, while just getting the flat cut means less trimming but potentially less flavor.
Another factor to consider is size – larger cuts can take longer to cook but may be more economical if feeding a crowd, while smaller cuts are quicker but may not yield as much meat.
Trimming the Brisket
This will not only improve the appearance of your finished product but also help prevent flare-ups on the grill. Start by placing your brisket on a cutting board with the fat cap facing up.
Use a sharp knife to carefully remove any large pieces of visible fat, leaving about 1/4 inch layer intact for flavor and moisture retention during cooking.
Next, locate and remove any thick layers of silver skin that may be present on either side of the meat using a fillet knife or boning knife. Silver skin is tough connective tissue that won’t break down during cooking and can make for an unpleasant eating experience if left in place.
Preparing the Brisket
First, remove the brisket from its packaging and rinse it under cold water. Pat dry with paper towels and place on a clean cutting board.
Next, trim any excess fat from the brisket using a sharp knife. Leave about ¼ inch of fat on top to help keep the meat moist during cooking.
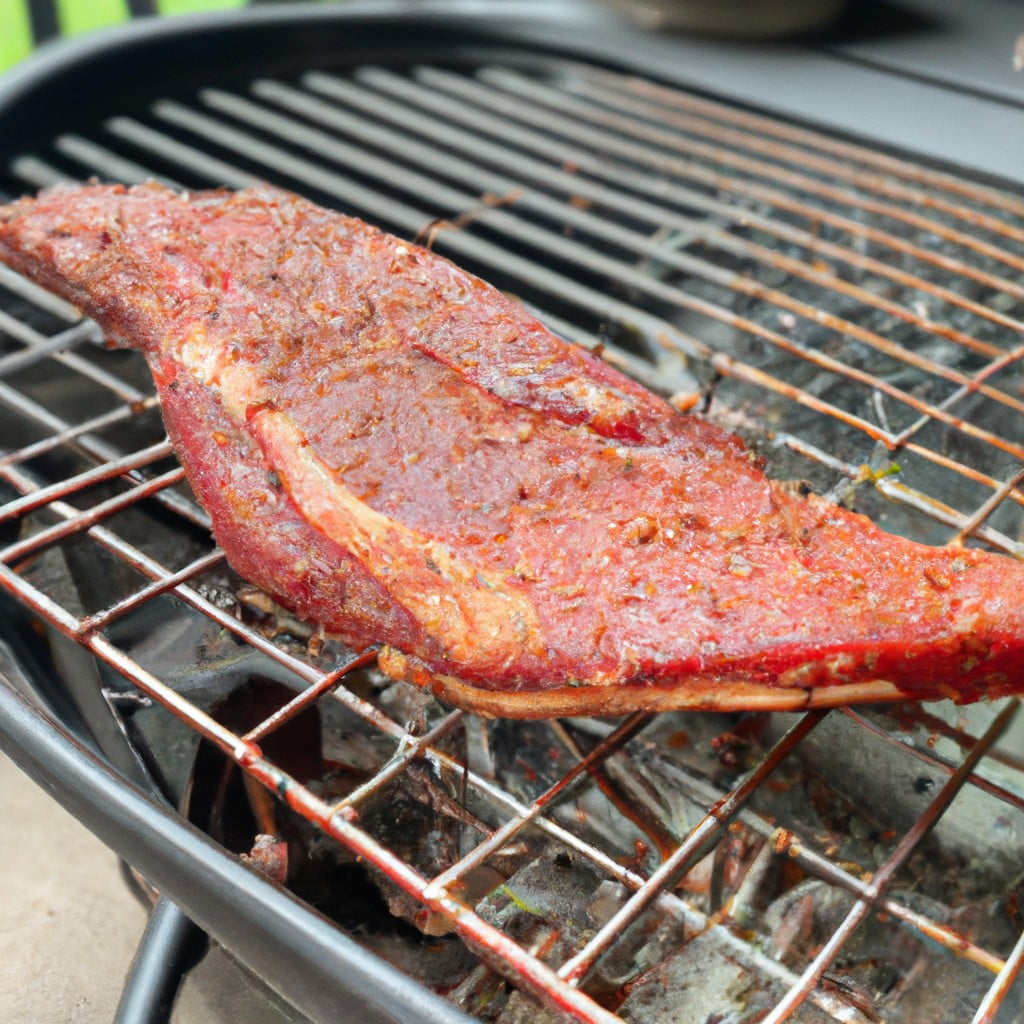
Once trimmed, score the fatty side of your brisket in a diamond pattern with shallow cuts about 1/4 inch deep. This will allow for better seasoning penetration and create more surface area for bark formation.
After scoring, apply your favorite rub or seasoning generously all over both sides of the meat until fully coated. Be sure to massage it into every nook and cranny for maximum flavor infusion.
Seasoning the Brisket
Seasoning is an essential step in the process of cooking a delicious brisket on a gas grill. The seasoning mix can be as simple or complex as you like, but we recommend keeping it simple for your first attempt.
A classic Texas-style rub consists of salt, black pepper, garlic powder and paprika in equal parts. You can also add other spices such as cumin or chili powder to give it more depth of flavor.
To apply the seasoning evenly over the entire surface area of the meat, use your hands to massage it into every nook and cranny. Make sure that all sides are coated with an even layer of seasoning.
After applying the rub generously onto both sides of your brisket let sit at room temperature for 30 minutes before placing on grill grates.
Marinating the Brisket
Marinating is an optional step, but one that can add a lot of flavor to your meat. A good marinade will help tenderize the meat and infuse it with additional flavors.
There are many different types of marinades you can use for brisket, from simple saltwater brines to complex spice blends mixed with vinegar or citrus juices. You can also experiment with beer-based marinades or even fruit purees.
To marinate your brisket properly, place it in a large resealable plastic bag or container and pour in enough marinade to cover the entire surface area of the meat. Seal tightly and refrigerate for at least 4 hours (or up to 24 hours) before cooking.
When ready to cook, remove the brisket from its marinade and pat dry with paper towels before placing on your gas grill according to our previous instructions.
Gas Grill Setup
First, make sure that the grates are clean and free of debris. Then, turn on all burners to high heat and close the lid for about 10-15 minutes until the grill reaches a temperature of around 250°F – 275°F.
Once you’ve reached this temperature range, turn off one side of the burners (the indirect heat side) while leaving the other side on (the direct heat side). This will create two zones in your gas grill: a hot zone for searing and browning meat quickly over direct heat; and a cooler zone where you can cook low-and-slow using indirect heat.
It’s also recommended to use a smoker box filled with wood chips or chunks placed directly over one burner on top of some aluminum foil. This will help infuse smoky flavor into your brisket as it cooks.
Temperature Control
Maintaining the right temperature ensures that your meat cooks evenly and stays tender and juicy. To achieve this, you need to have a reliable thermometer to monitor the internal temperature of your brisket.
Start by preheating your gas grill to 225°F – 250°F (107°C -121°C). Once it reaches the desired temperature, turn off one or more burners depending on how many zones you have in your grill.
This will create an indirect heat zone where you can place the brisket for slow cooking.
It’s important not to open the lid too often as this can cause fluctuations in temperature which may affect how well-cooked and tender your meat turns out. Instead, use a remote thermometer with probes inserted into different parts of the meat so that you can monitor its progress without having to lift up any lids.
Using a Smoker Box
A smoker box is a small metal container that holds wood chips and sits on top of the grill grates. As it heats up, smoke will be released from the wood chips and infuse into your meat.
To use a smoker box, simply fill it with your favorite type of wood chips (such as hickory or mesquite) and place it directly on top of one of the burners in your gas grill. Make sure that you soak the wood chips in water for at least 30 minutes before adding them to the smoker box; this will help them produce more smoke.
Once you’ve added your soaked wood chips to the smoker box, turn on all burners except for one or two (depending on how hot you want your grill). Place an aluminum foil pan filled with water under where you’ll be cooking brisket; this helps regulate temperature and keeps moisture levels high inside.
Creating Smoke On a Gas Grill
While gas grills don’t naturally produce smoke like charcoal or wood-fired grills, there are ways to create smoke and infuse your brisket with delicious smoky flavors.
The easiest way to add smoke to your gas grill is by using a smoker box. A smoker box is an accessory designed specifically for use with gas grills, which holds wood chips and allows them to slowly burn and release flavorful smoke into the cooking chamber.
To use a smoker box, simply fill it up with your favorite type of wood chips (such as hickory or mesquite), place it directly over one of the burners in your grill, close the lid and let it heat up until you see wisps of smoke coming out from under the lid.
Another option for creating more intense smoky flavors is by wrapping some soaked wood chips in aluminum foil packets punctured with holes before placing them directly onto hot coals inside an outdoor fireplace or fire pit near where you’re cooking. This method will give off more intense aromas than just using regular smoking woods alone because they’ll be heated faster due their proximity while still providing enough time for those essential oils within each chip’s fibers get released during combustion process – resulting in even richer taste sensations!
Indirect Heat Cooking
This means that you will not be placing the meat directly over the flames, but rather to one side of them. Indirect heat allows for slow and even cooking, which is essential for achieving tender and juicy brisket.
To set up your gas grill for indirect heat cooking, turn on all burners to high until it reaches 400°F (204°C). Then turn off one or more burners depending on how many zones you want to create.
Place a drip pan under where the meat will go and add water or beer into it; this helps keep moisture in your brisket while also catching any drippings.
Once your grill has reached temperature with only one burner running (or two if creating two zones), place your seasoned brisket onto an oiled grate above where there are no flames underneath it – this should be opposite from where you turned off the burner(s).
Close down lid vents so that smoke can circulate around inside without escaping too quickly out through these openings; then adjust remaining burner(s) as needed so that temperature stays between 225-250°F (107-121°C).
Grilling Time Estimation
The cooking time for a brisket can vary depending on its size, thickness, and the temperature of your gas grill. As a general rule of thumb, plan for about 1 hour per pound at 225-250°F (107-121°C) until the internal temperature reaches around 195°F (90°C).
However, this is just an estimate as every piece of meat is different.
To get more accurate timing estimates based on your specific cut and grill setup use a digital thermometer with an alarm function or invest in smart grilling technology that will monitor both meat temperature and cooking times remotely via smartphone apps.
Remember not to rush things when grilling brisket; low-and-slow is key! Rushing through cook times may result in tough or chewy meat instead of tender juicy slices.
Checking Meat Temperature
This will help ensure that your meat is cooked to perfection and safe for consumption. To check the temperature of your brisket, use a digital meat thermometer inserted into the thickest part of the meat without touching any bones or fat.
For optimal tenderness and juiciness, aim for an internal temperature between 195°F – 205°F (90°C – 96°C). However, if you prefer a firmer texture with less moisture loss in each slice, remove it from heat at around 185°F (85°C).
Remember that every cut of beef is different so cooking times may vary depending on factors such as thickness and marbling. Don’t rely solely on time estimates; always use a thermometer to ensure accurate results.
What Is “The Stall”?
It can be frustrating to see that your brisket isn’t progressing in temperature despite being on the grill for what seems like an eternity. But don’t worry, this is completely normal and happens due to evaporative cooling caused by moisture escaping from within the meat.
The stall typically occurs around 160-170°F and can last anywhere from a few minutes to several hours depending on various factors such as humidity levels, size of brisket, etc. The good news is that once it’s over, your brisket will start rising in temperature again until it reaches its desired internal temp (around 195-205°F).
To power through “the stall,” some pitmasters use a technique called “The Texas Crutch” where they wrap their briskets tightly in foil or butcher paper during this phase to help push through and speed up cooking time. However, others prefer not to crutch their meats at all since it can affect bark formation.
The Texas Crutch
This method involves wrapping the brisket in foil or butcher paper during the cooking process to help retain moisture and heat. The result is a faster cook time with an incredibly juicy end product.
However, some BBQ purists argue that this method can compromise flavor and texture by steaming rather than smoking the meat. It’s important to note that using “The Texas Crutch” should be done with caution as it can affect your desired outcome.
If you do decide to use this technique, wrap your brisket when it reaches an internal temperature of around 160-170°F (71-77°C). Be sure not to wrap too tightly as this could cause steam buildup leading to mushy meat instead of tender slices.
Ultimately, whether or not you choose “The Texas Crutch”, remember that patience is key when cooking any cut of meat on your gas grill.
Wrapping in Foil
Once your brisket has reached an internal temperature of around 160°F, it’s time to wrap it tightly in aluminum foil or butcher paper. This will help lock in moisture and create a steamy environment for the meat to cook in.
Some people prefer using butcher paper over foil as it allows more smoke flavor into the meat while still keeping it moist. However, if you’re new to wrapping your brisket, we recommend starting with aluminum foil until you get comfortable with this method.
When wrapping your brisket, make sure that there are no holes or gaps where steam can escape as this will dry out the meat. You want all those delicious juices locked inside! Place wrapped briskets back on grill grates and continue cooking until they reach an internal temperature of 195-205°F for optimal tenderness.
Remember that every piece of meat is different so use these temperatures only as guidelines rather than strict rules – always rely on visual cues such as color and texture when determining doneness.
Basting the Brisket
Basting involves brushing or spraying the meat with liquid to keep it moist and add flavor. You can use a variety of liquids for basting, such as apple juice, beer, or even just water.
To begin basting your brisket on a gas grill, mix together your desired ingredients in a spray bottle or bowl. Open the lid of your grill and quickly spritz or brush the mixture onto both sides of the brisket every 30 minutes to an hour.
Be careful not to overdo it with too much liquid as this can cause flare-ups on your gas grill and affect temperature control. Also avoid opening up the lid too often as this will let out heat and smoke which are crucial elements in achieving that perfect BBQ flavor.
Resting the Brisket
Resting allows the juices to redistribute throughout the meat, resulting in a more tender and flavorful final product.
To rest your brisket, remove it from the grill and wrap tightly in foil or butcher paper. Place in a cooler or warm oven (around 150°F) for at least an hour but up to four hours if you have time.
During this resting period, resist any temptation to slice into your beautiful creation! Letting that brisket sit undisturbed will ensure that all of those delicious juices stay inside where they belong instead of running out onto your cutting board.
Slicing the Brisket
Slicing the brisket is an art form in itself, as you want to ensure that each piece is tender and juicy with a perfect bark on the outside. Start by slicing against the grain of the meat, which will help break down any tough fibers and make it easier to chew.
Use a sharp knife or electric slicer for best results.
Begin by cutting off any excess fat from both sides of the brisket before slicing into thin slices about ¼ inch thick. Be sure not to cut too thickly or too thinly as this can affect both texture and flavor.
Serving Suggestions
There are many ways to serve and enjoy brisket, depending on personal preference and regional traditions. One classic way is to slice it against the grain into thin pieces and serve with BBQ sauce or a dry rub seasoning blend.
You can also make sandwiches by placing sliced brisket between two slices of bread or buns with some coleslaw for added crunch.
Another popular serving suggestion is making tacos by adding diced onions, cilantro, lime juice, avocado slices or guacamole over warm tortillas filled with shredded beef.
For those who prefer something more substantial than sandwiches or tacos but still want an easy meal option that doesn’t require much preparation time after grilling – try serving sliced brisket alongside baked beans and cornbread for a hearty Southern-style feast.
Storing and Reheating Leftovers
To keep the meat fresh and flavorful, wrap it tightly in plastic wrap or aluminum foil and place it in an airtight container. Store the container in the refrigerator for up to four days.
When reheating leftover brisket, there are a few things to keep in mind. First of all, make sure that you reheat slowly over low heat so that the meat doesn’t dry out or become tough.
You can use an oven set at 250°F (120°C) or a microwave on medium power.
If possible, add some moisture back into the meat by placing it on top of some beef broth while reheating. This will help prevent drying out and ensure that your leftover brisket is just as juicy as when you first cooked it.
With these tips for storing and reheating leftovers from your gas grill-cooked brisket dish , you’ll be able to enjoy this classic BBQ staple even after its initial serving!
FAQ
How long does it take to cook a brisket on a gas grill?
It takes 5-6 hours to cook a brisket on a gas grill to achieve a smoky flavor.
How do you cook a brisket on a gas grill without smoke?
To cook a brisket on a gas grill without smoke, preheat the grill to 225-250 degrees, place the brisket over an unlit or low burner, maintain the cooking temperature with the lid closed throughout.
How long to cook a 3 pound brisket on a gas grill?
To cook a 3-pound brisket on a gas grill, sear it for 20 minutes per side and then allow approximately 3 hours of cooking time.
What are the best temperature settings for cooking brisket on a gas grill?
The best temperature settings for cooking brisket on a gas grill are 225-250°F (107-121°C).
What are some marinating tips for preparing brisket before grilling on a gas grill?
Some marinating tips include using a flavorful liquid with oil, acid, and seasonings, letting it sit for at least 6 hours, and turning the meat occasionally for even flavor absorption.
Can you provide a step-by-step guide to cook a perfect brisket on a gas grill?
Preheat grill, prepare brisket with rub or marinade, place on grill with fat side up, cook on low heat, maintain temperature at 225°F, use a water pan to maintain moisture, cook for 8-10 hours, check internal temperature to reach 195-203°F, remove and let it rest, then slice and serve.