Discover the art of mastering heat control on your charcoal grill to elevate your grilling skills and impress friends with perfectly cooked BBQ delights.
As the sun sets, you fire up your charcoal grill in anticipation of a delicious BBQ feast. But as you start cooking, you realize that controlling the heat on a charcoal grill is no easy feat.
Whether it’s too hot or too cold, getting the temperature just right can seem like an impossible task. But fear not! With a few simple tips and tricks, you can master the art of heat control on your charcoal grill and cook up mouth-watering meals every time.
So grab your tongs and let’s get grilling!
Choosing the Right Charcoal
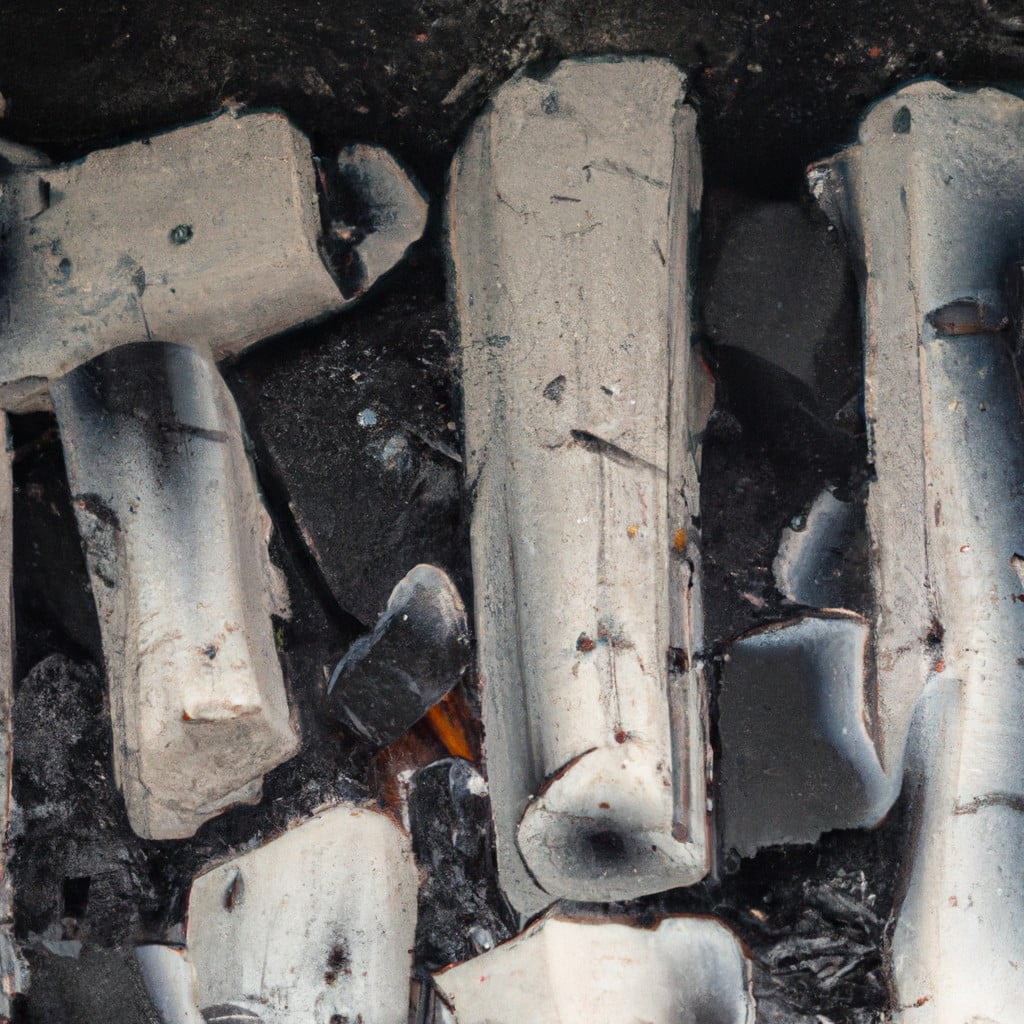
Choosing the right charcoal is crucial for heat control on your grill. There are two main types of charcoal: briquettes and lump charcoal.
Briquettes are made from compressed sawdust, while lump charcoal is made by burning wood without oxygen to create charred pieces of hardwood.
Briquettes burn longer and more consistently than lump charcoal, making them ideal for low-and-slow cooking methods like smoking or roasting. They also produce less ash than their counterpart.
Lump Charcoal burns hotter and faster than briquettes, which makes it perfect for high-heat grilling such as searing steaks or burgers quickly over direct heat.
When choosing between these two options consider what you will be cooking most often on your grill before deciding which type of coal to use. In addition to the type of coal used, it’s important to choose a quality brand that doesn’t contain any additives or chemicals that could affect the taste of your food negatively.
Look out for brands with certifications such as “100% natural” or “organic.”.
Lighting the Charcoal
There are several methods for lighting a charcoal grill, but some work better than others. One of the most popular ways is using a chimney starter.
To use a chimney starter, fill it with enough briquettes or lump charcoal to cover the bottom grate of your grill. Then place crumpled newspaper in the bottom chamber and light it up from below using long matches or lighter fluid.
Once lit, let it burn until all coals are covered in white ash (usually 20-30 minutes). Carefully pour hot coals onto one side of your grill for indirect heat cooking or spread them evenly across both sides if you’re going for direct heat grilling.
Starting a Charcoal Grill: Top Methods
There are several methods for starting a charcoal grill, but some work better than others. Here are some of the top methods:
1. Chimney Starter: This is one of the most popular and efficient ways to start a charcoal fire.
Simply fill the chimney starter with briquettes or lump charcoal and place crumpled newspaper in the bottom chamber before lighting it.
2. Electric Starter: An electric starter is another easy way to get your coals going quickly without using lighter fluid or other chemicals.
3. Lighter Fluid: While this method can be effective, it’s important not to use too much lighter fluid as this can result in an unpleasant taste on your food.
4. Natural Fire Starters: You can also use natural fire starters such as wood chips or chunks soaked in cooking oil for added flavor while avoiding chemical additives found in commercial products.
Building a Two-Zone Fire
A two-zone fire is an excellent way to achieve this. It involves placing all the hot coals on one side of the grill and leaving the other side empty, creating two distinct cooking areas.
This technique allows you to sear meat over high heat before moving it to a cooler area for slower cooking or indirect grilling. For example, if you’re grilling thick steaks, start by searing them over direct heat in the hot zone until they develop that beautiful crusty exterior.
Then move them over to cook through more slowly in the cooler zone.
To build a two-zone fire, pile up your charcoal briquettes or lump charcoal on one half of your grill’s bottom grate and leave space for another half without any coals underneath it. Light up your charcoals using either lighter fluid or chimney starter depending upon what suits you best.
Once lit properly (when they are covered with white ash), use long-handled tongs and spread out some unlit coal from hotter section into colder section so that both sides have equal amount coal but only one has been ignited fully while other remains unlit.
Building a Three-Zone Fire
This technique involves creating three distinct temperature zones on your grill: high, medium, and low.
To build a three-zone fire, start by piling all of your lit coals onto one side of the grill. This will create the high-heat zone for searing meats or cooking foods that require intense heat.
The middle section should have fewer coals and provide medium heat for cooking vegetables or thinner cuts of meat. Leave an area with no coals at all to create the low-heat zone where you can move food to finish cooking without burning it.
By using this method, you can easily move food around as needed while maintaining precise temperature control throughout the grilling process.
Adjusting Air Vents
The vents control airflow, which affects how hot or cool your coals burn. To increase heat, open up the vents to allow more oxygen into the grill and fuel your fire.
Conversely, if you need to lower temperatures, close down some of those same openings to reduce oxygen flow.
It’s essential to keep an eye on both intake and exhaust vent positions throughout cooking as they can significantly impact temperature stability over time. If you’re struggling with maintaining consistent temperatures during long cooks like smoking brisket or pork shoulder for hours at a time – try using fewer lit coals initially so that it takes longer for them all catch fire evenly across their surface area before adding more unlit ones gradually until desired temperature range is achieved.
Adjusting Airflow for Temperature Control
The amount of oxygen that reaches the coals directly affects their temperature, so it’s crucial to know how to regulate it. To increase the temperature, open up your vents and allow more air into your grill.
Conversely, if you need to lower the heat level, close down some or all of your vents.
It’s essential not only to adjust but also monitor airflow throughout cooking time as wind conditions can change quickly and affect temperatures significantly. If you’re using a smoker box or wood chips for flavoring purposes during grilling sessions with indirect heating methods like smoking ribs or brisket low-and-slow style over several hours at 225°F-250°F range – then maintaining consistent smoke production requires careful attention paid towards regulating both air intake (through vent openings) as well as exhaust flow (via chimney).
Using a Grill Thermometer
A grill thermometer allows you to accurately measure the temperature inside your grill and adjust it accordingly. There are two types of thermometers that you can use: analog and digital.
Analog thermometers are simple, inexpensive, and easy to use. They consist of a metal probe that is inserted into the meat or placed on top of the cooking grate to measure temperature.
Digital thermometers offer more accuracy than analog ones because they have an electronic display that shows precise readings in real-time. Some models even come with wireless capabilities so you can monitor temperatures from afar.
No matter which type you choose, make sure it’s calibrated correctly before using it for accurate readings. Place your thermometer at different spots around your cooking area as hot spots may occur due to uneven coal distribution or airflow issues.
Monitoring the Distance Between Food and Coals
The closer your food is to the coals, the hotter it will cook. Conversely, if you move your food further away from the coals, it will cook more slowly.
To monitor this distance effectively, use a raised cooking grate or adjust its height using an adjustable charcoal grate system. This way you can easily raise or lower your cooking surface as needed to control temperature.
It’s also essential to keep an eye on how much fuel remains in your grill throughout cooking time since burning coal produces ash that accumulates under grates and raises them higher than intended over time.
Direct Vs Indirect Grilling
Direct grilling involves placing food directly over the hot coals, while indirect grilling involves cooking food next to or above the heat source.
Direct grilling is best for foods that cook quickly and benefit from a seared exterior, such as burgers, steaks, and vegetables. Indirect grilling is ideal for larger cuts of meat that require longer cooking times at lower temperatures.
To set up your grill for direct or indirect heat depends on what you’re cooking. For direct heat method place charcoal in one layer across the bottom of your grill grate; this will create an even heating surface with no cool spots where food can undercook or burn.
For indirect heating method move all charcoal to one side of the grill so you have a hot zone (direct) on one side and cooler zone (indirect) on another side; this allows you more control over temperature regulation during long cooks like roasts or whole chickens.
Heat Management Using Grill Lids
The lid helps trap heat and smoke, creating an oven-like environment that cooks food evenly. When you close the lid, it also reduces airflow to your coals, which can help lower temperatures if they get too high.
However, not all grilling recipes require a closed-lid cooking method. For example, direct grilling (cooking directly over hot coals) works best without a lid because it allows for better searing and caramelization of meats.
When using your grill’s lid for heat management purposes, make sure to keep an eye on your food’s progress through the vents or by lifting up one side of the grate slightly. This will allow you to monitor temperature levels while keeping in mind how much time has passed since you started cooking.
Using a Water Pan for Moisture
A water pan can help regulate temperature and add moisture to the cooking environment, which is especially important when grilling meats that tend to dry out quickly.
To use a water pan, simply fill it with hot or boiling water and place it on the grate next to your food. The steam from the hot water will create an ideal cooking environment that helps keep meat moist while also regulating temperature.
When using a water pan, be sure not to let it run dry as this can cause damage or even start fires in some cases. Keep an eye on its level throughout your cook and refill as needed.
Controlling Flare-Ups
They occur when fat drips onto the hot coals, causing flames to shoot up and scorch your food. Not only do flare-ups create an unpleasant taste, but they can also be dangerous if left unattended.
To control flare-ups, you need to reduce the amount of fat dripping onto the coals. One way to do this is by trimming excess fat from your meat before cooking it.
You can also use leaner cuts of meat or marinate them in vinegar-based sauces that help break down fats.
Another effective method for controlling flare-ups is by using indirect heat instead of direct heat while grilling fatty meats like burgers or sausages. This involves moving your food away from direct contact with the coals and placing it on a cooler part of the grill where there are no flames.
If you still experience flare-ups despite these measures, keep a spray bottle filled with water nearby so that you can quickly douse any sudden bursts of flame as soon as they appear.
Managing Flare-Ups
These sudden bursts of flames can quickly burn your food and ruin your BBQ feast. But don’t panic! There are ways to manage flare-ups and prevent them from ruining your meal.
One way to manage flare-ups is by moving the food away from the direct heat source or reducing airflow into the grill. This will help reduce oxygen supply to the fire, which in turn reduces flame intensity.
Another option is using a spray bottle filled with water or apple cider vinegar to extinguish small flames as they arise without affecting cooking temperature significantly.
If all else fails, remove any burnt pieces of meat and continue grilling on lower heat until it’s cooked through evenly without burning further.
Using a Grill Shield for Heat Control
A grill shield is essentially an aluminum or stainless steel sheet that you can place between the food and the coals to protect it from direct heat. This method works particularly well when cooking foods that require low, slow cooking such as ribs or brisket.
To use a grill shield, simply place it on top of the grates and position your food on top of it. The shield will help distribute heat evenly across your meat while also preventing flare-ups caused by dripping fat.
When using this technique, be sure to monitor the temperature regularly with a thermometer to ensure even cooking throughout.
Adding More Charcoal Mid-Cook
This can be especially frustrating if your food isn’t cooked yet. But don’t worry, adding more charcoal mid-cook is a simple solution to this problem.
To add more charcoal during cooking, first remove the grill grate and set it aside in a safe place. Then use tongs to move any remaining coals to one side of the grill or push them all together in the center of your fire pit.
Next, light new coals using a chimney starter or by placing them on top of hot embers from an existing fire until they ignite and turn gray with ash.
Once lit, carefully pour these new coals onto one side of your existing bed of hot embers so that they gradually catch fire and start heating up again without causing too much smoke or flare-ups.
Replace the grill grate over both sides (old & new)of coal bed once everything has heated up evenly again.
Cooling Down a Charcoal Grill
It’s important to let the coals burn out completely before disposing of them. One way to speed up the cooling process is by closing all vents and putting on the lid for about 15-20 minutes.
This will starve the fire of oxygen and extinguish any remaining embers.
Once you’re sure that there are no more hot spots or glowing embers, use tongs or a metal scoop to transfer ash into a metal container with tight-fitting lid for safe disposal once they have cooled off completely.
Remember never dispose of hot ashes in plastic bags, paper bags or cardboard boxes as this can cause fires even hours after grilling has ended.
Knowing When to Cook Food
Overcooking or undercooking can ruin even the best cuts of meat, so it’s essential to know when your food is ready. One way to determine if your meat is cooked correctly is by using a thermometer.
Inserting a thermometer into the thickest part of the meat will give you an accurate reading and ensure that it’s safe for consumption.
Another method for checking doneness involves using touch and sight. For example, pressing down on steak with tongs can help you gauge its level of doneness: rare steaks are soft; medium-rare steaks are slightly firmer; medium steaks have some resistance but still yield easily; well-done steaks feel firm.
When cooking chicken or pork, make sure there’s no pink in their center before serving them up – this indicates they’re not fully cooked yet! Fish should be opaque throughout once done cooking too.
Grill Cleaning and Maintenance
Proper cleaning and maintenance will not only extend the life of your grill but also ensure that it functions efficiently for future cookouts. Start by removing any leftover charcoal ash from the bottom of the grill using a brush or scraper tool.
Then, use warm soapy water to scrub down all surfaces including grates, burners (if applicable), and exterior parts like handles or knobs.
For stubborn grease stains on grates, you can use a specialized cleaner or simply heat up the grill for 10-15 minutes before brushing them off with a wire brush. It’s important to note that harsh chemicals should be avoided as they can damage both your health and equipment.
Once cleaned thoroughly, inspect all parts of your charcoal grill for wear-and-tear such as rusted metal components or damaged hoses if you have gas-powered models. Replace any worn-out parts immediately before storing away until next time.
Grill Safety Tips
Here are some essential tips for keeping yourself and others safe while grilling:
- Always keep your grill at least 10 feet away from any structures or flammable materials.
- Never leave your grill unattended while it’s in use.
- Keep children and pets away from the grill area.
- Use long-handled tools to avoid burns or injuries.
- Wear heat-resistant gloves when handling hot coals or grates.
- Use a fire extinguisher nearby in case of emergencies.
By following these simple safety guidelines, you can enjoy the pleasures of outdoor cooking without putting yourself or others at risk of injury or damage to property.
Now that we’ve covered some basic safety tips let’s dive into how you can control heat on your charcoal grill like an expert!
FAQ
Does opening the vents on a charcoal grill make it hotter?
Yes, opening the vents on a charcoal grill makes it hotter and allows the charcoal to burn faster due to increased oxygen supply.
How do I keep my grill at 250?
To maintain your grill at 250°F, light 5 coals and evenly distribute them among the unlit coals on one side of the grate.
What factors influence maintaining a consistent temperature on a charcoal grill?
Factors influencing consistent temperature on a charcoal grill include coal amount, air circulation, grill type, and proper heat management.
How can one safely adjust the charcoal distribution for optimal heat control?
To safely adjust the charcoal distribution for optimal heat control, one should use tongs or a fireproof glove to reposition the charcoal while maintaining a safe distance from the heat source.
What are the best techniques for monitoring and managing heat levels in different grilling scenarios?
The best techniques for monitoring and managing heat levels in different grilling scenarios include using a thermometer, adjusting cooking times and temperatures, and creating heat zones.
Related Articles
 How to Build a Brick BBQ with Chimney for Ultimate Grilling
 How to Clean Electric Grill: Easy Steps for Spotless Results
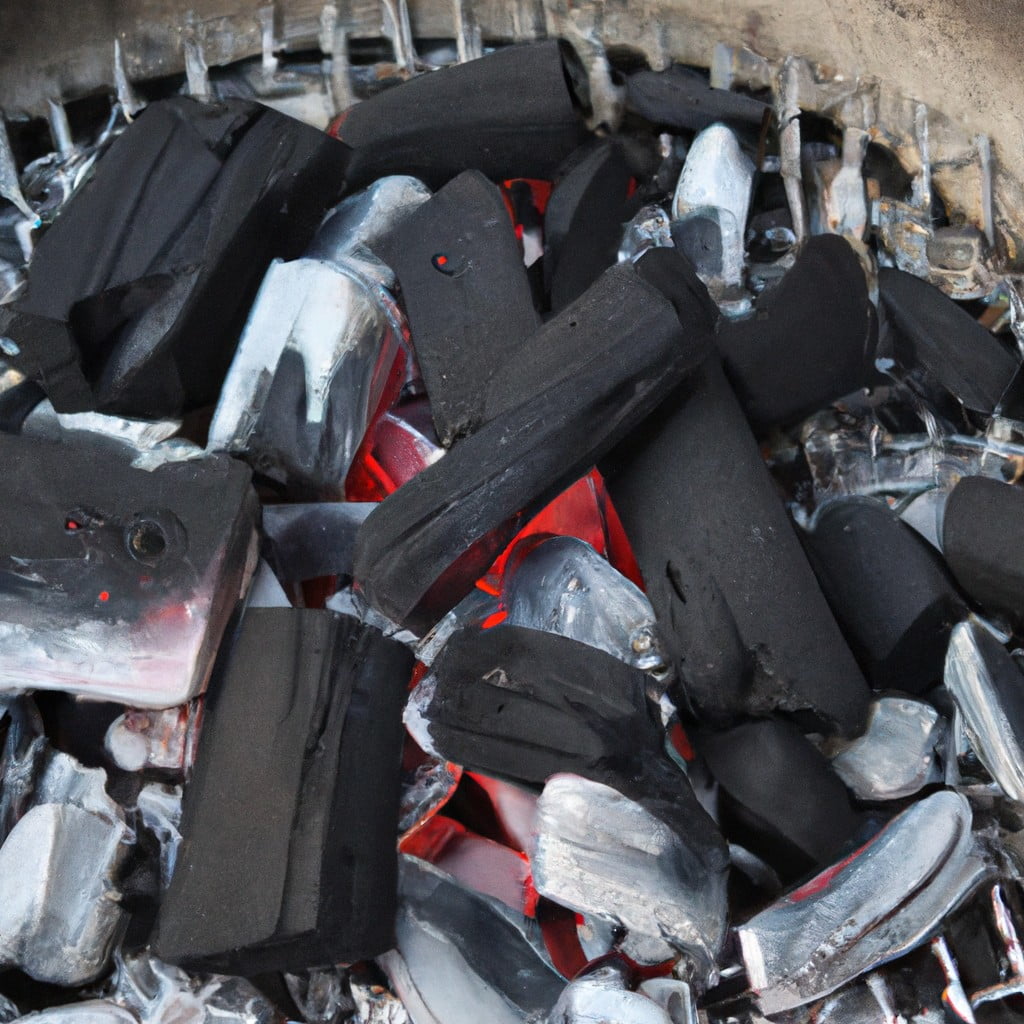 How Much Charcoal to Use in a Grill: Ultimate Guide & Tips
 How to Remove a Propane Tank from Grill: Easy Steps & Safety Tips
 How to Keep Mice Out of Grill: Simple Tips for a Rodent-Free BBQ