Learn how to master the art of slow-cooking ribs in a crockpot for tender, fall-off-the-bone goodness every time.
Key takeaways:
- Choose the right ribs: baby back or St. Louis style
- Prep the ribs by removing the membrane and cutting them to fit
- Create a flavorful dry rub with a balance of sweet, savory, and spicy ingredients
- Set up the slow cooker with the ribs arranged along the perimeter and add a liquid for tenderness
- Let the ribs rest before slicing to allow flavors to lock in and use a sharp knife for clean cuts.
Choosing the Right Ribs
Baby back or St. Louis style? That’s your first decision point. Baby backs are leaner, shorter, and often labeled as loin ribs. Their tender nature is a perfect match for the low and slow love affair that a crockpot provides. St. Louis ribs, trimmed from spare ribs and more consistent in shape, hold up well in the slow cooker’s tight quarters. They boast a higher fat content, which melts into succulent flavor over the hours.
The thickness of the meat should be even to prevent some parts from turning to mush while others beg for more time. Shoot for ribs with good meat coverage over the bones; this isn’t the time for a scant rack.
Inspect the ribs for meat quality. The freshest ribs will have a healthy, pinkish hue and little to no smell. If the rack looks a bit like its days in the grocery case have been long, steer clear. The slow cooker will amplify the meat’s flavors, good or bad.
Always check that the size of the rib rack will fit in your slow cooker. It might take a little rack wrangling – think bending or cutting – but it’s better than realizing mid-seasoning that you’ve got a square peg, round hole situation on your hands.
Preparing Ribs for the Slow Cooker
Before you pop those ribs into the cozy confines of a slow cooker, a little prep work goes a long way. Start by patting the ribs dry with paper towels; moisture is not your ally here. Next, if your ribs still sport that pesky membrane on the underside, it’s got to go—it’s as welcome as a rain cloud at a picnic. Peel it off gently; think of removing a sticker from a tomato.
Now to ensure those ribs fit comfortably in their slow cooker bed, you might need to cut them down to size. Don’t hesitate to divide and conquer; it’s better than playing a frustrating game of Tetris trying to make them fit.
Lastly, let’s not forget the dry rub. Massaging those flavors into the meat is like ensuring a well-spiced dream for hours. It’s this loving touch that turns a simple dish into a symphony of taste. With your ribs now prepped and ready, it’s time to let the slow cooking magic do the heavy lifting.
Dry Rub Ingredients and Application
An expertly crafted dry rub can turn humble ribs into a carnivorous masterpiece. The core components usually include a balance of sweet, savory, and spicy. Brown sugar lays the foundation, melting into a glaze that hugs the ribs with a caramelized hug. Paprika dons the mantle of both color and mild heat, while garlic and onion powder contribute earthy undertones.
A pinch of cayenne pepper brings a gentle kick, daring you to take another bite. Don’t forget salt and black pepper – these seasonings are the old faithful of your rub, ensuring the other flavors stand at attention. For an unexpected twist, ground coffee or cocoa powder can add depth that keeps taste buds guessing.
When applying, treat your ribs like a canvas, the rub your paint. Coat them liberally and rub the mixture in with gusto to every crevice and corner. Imagine the seasoning creating a flavor-packed crust as the ribs tenderize slowly in the crockpot. The rub should cling to the meat, so let these seasoned ribs sit briefly before they bathe in the low heat of your slow cooker. This brief pause allows the flavors to become well-acquainted, setting the stage for the transformation ahead.
Slow Cooker Setup and Cooking Process
Before diving in, let’s get one thing straight: simplicity is the backbone of using a slow cooker for ribs. You’ll want to start by ensuring the ribs fit snugly, so if you need to, cut them into smaller sections. Arranging them along the perimeter, standing on their side with the meaty part facing outwards, optimizes exposure to the slow cooker’s consistent heat.
Pour in your liquid—a mix of apple juice, vinegar, or stock; just enough to create a humid environment without submerging the ribs. This is the secret handshake between meat and moisture that yields tenderness.
Now, secure the lid and set your temperature. A low and slow approach is the golden ticket. Expect to allot about 6-8 hours for that fall-off-the-bone magic; patience is a virtue that pays off deliciously. If your schedule’s tight, the high setting for 3-4 hours can pinch-hit, but remember the mantra: low and slow.
Think of your kitchen as the calm before the storm of savor that’s about to unfold—once those ribs are cooking, there’s not much to do other than let the slow cooker work its wizardry. Occasionally peeking through the lid to admire should not be mistaken for an actionable step, mind you.
As the ribs bask in low heat, the connective tissues break down without any need for vigilant oversight. This leisurely pace allows flavors to marry and infuse deeply into the meat, which is the name of the game in flavor town.
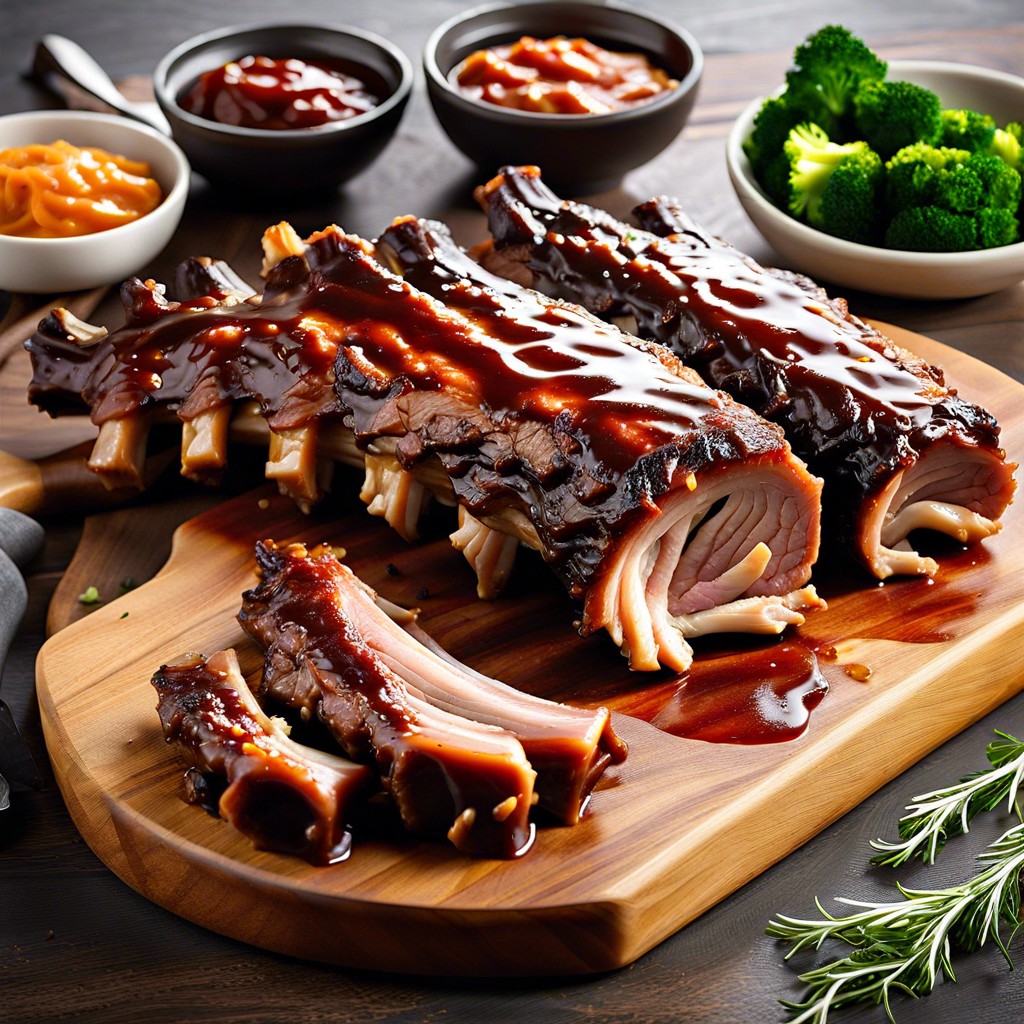
Resting and Slicing the Ribs
Patience is a virtue, especially after your crockpot has worked its magic. The ribs have bathed in low heat for hours, absorbing flavors to the bone. But before you carve, give them a well-deserved rest. This pause allows juices to redistribute, ensuring every bite is succulent.
Resting isn’t complex; just tent the ribs with foil for about 10 to 15 minutes. This short break is the bridge between cooking and consummation, a precious time for flavors to lock in.
When it’s time to slice, find the right tool: a sharp knife will glide through the tender meat, revealing the coveted smoke ring. Rather than sawing, let the knife do the work. Follow the natural seams of the ribs to separate them cleanly.
The angle of the slice can make a world of difference in presentation. Aim for uniformity but don’t sweat the small stuff – after all, true beauty is found in the taste.